


You've gone through the design process in building a website, but now you're left with a handful of HTML files, along with some images and one or more CSS and JavaScript files, and you want to know what to do with them? Great! Let's talk about it.
You could deploy (i.e. publish) them, and eventually you will, otherwise no one will see your site. But deploying at this point is only going to get you so far. Inevitably, you’re going to want to change something with the site, and then what? Are you going to go all the way through the design process again? That sounds … painful.
A more sustainable approach is to take the static HTML content you were given and templatize it! Make it easier for you to work with — to make changes and to create new pages — when the need arises.
Why templatize a website?
This process has one major benefit — reusability. It makes the act of adjusting structure or content relatively trivial when compared with having to work with individual HTML files. That process can be further enhanced by separating content from presentation, so that when all you need to do is change a few words, you know right where to go and never have to mess with any of the code. (We have a detailed guide for that, but you’ll want to follow this one first.)
Consider two typical and simple content pages that most sites have — Terms & Conditions and Privacy Policy. They often have the same header and footer. It’s just the content in the middle of the page that differs (though the structure is likely similar). With those pages as separate HTML files, when you want to change something in a shared section — like the header or footer — you have to make the change in both places.
Expand that example to a site that has hundreds of pages with a similar structure (like blog posts). You’d be making that change hundreds or thousands of times, depending on the size of your site.
Following a software development principle called don’t repeat yourself (often referred to as DRY code), you could build the site with reusable pieces. Then you can make each change once and have it work everywhere. This is the magic of templatizing.
How templatizing works
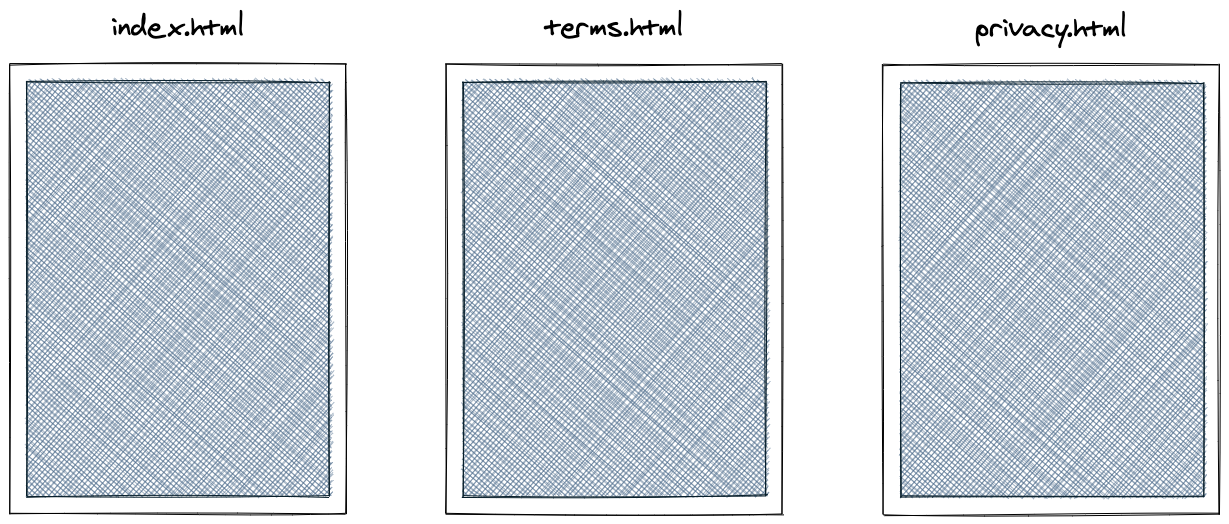
When you have no templates and only HTML, the code on each page is unique and lives within its own file. Take a super simple site that has a home page (index.html), along with Terms (terms.html) and Privacy (privacy.html) pages. Your files look like this, where the dark blue boxes represent the code unique to each page:
Now let’s say the header on the home page is unique, but the header on the Terms and Privacy (i.e. interior) pages could be shared. And maybe the footer is the same on every page. Then we could make the header and footer into their own files and share them among multiple pages. Like this:
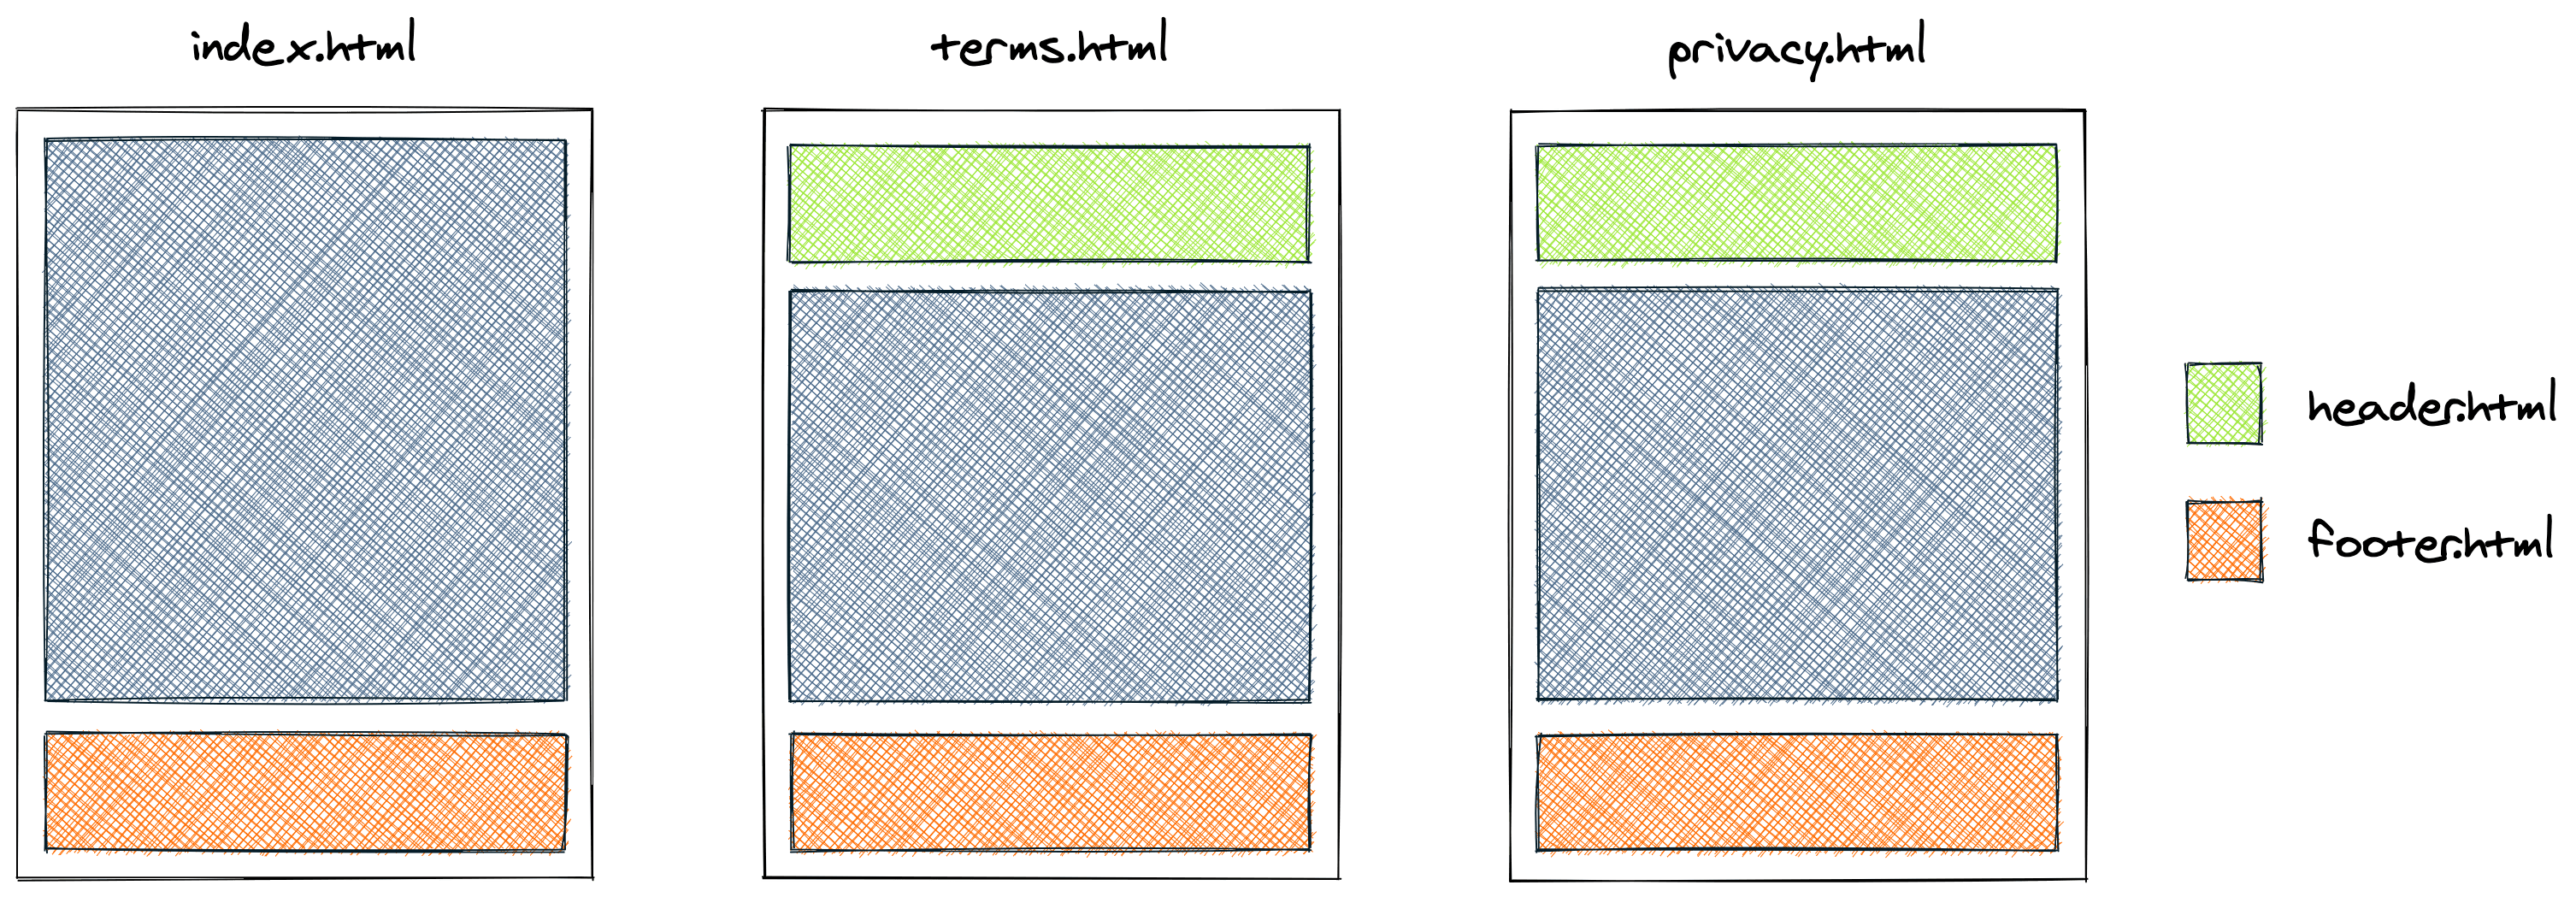
After creating these templates, changes to the footer only need to be made once and every page is updated to reflect the new changes.
This is a super simplistic view to show the power that even small abstractions can add to the longevity of your site. What we’ll do here will be slightly different in practice.
But how do we actually do this?
Static site generators are here to save the day!
Unfortunately, the web isn’t built to work with templates. We can’t actually just add a footer.html file and then tell every page to include it and have the browser work. In the end, the browser expects a single HTML file. In other words, the browser actually wants the non-templatized version of the two scenarios above.
But that’s not how we want to work. It’s tedious and prone to errors. If you want the footer to look the same everywhere, it should be the same everywhere. Otherwise, you risk making inadvertent changes on random pages. To help with this process we can use a tool called a static site generator.
There are many to choose from, perhaps including some popular ones you may have heard of, such as Jekyll, Gatsby, Next.js, or Hugo. Here we’re going to use one called Eleventy.
What’s so great about Eleventy?
Eleventy isn’t as popular as some of its competition, but it is supreme in its approach, which is simplicity. It is modeled after Jekyll, which provides a super low barrier to getting started when compared with the rest of the field. But unlike Jekyll, it is written entirely in JavaScript, which makes it a great fit for folks getting started with building websites.
Eleventy can also be super powerful. It takes more customization as your site grows in complexity, but it can grow with you. My site has several hundred pages and, at the time of writing this, is built entirely through Eleventy.
Okay, now are you convinced you should templatize those HTML files?
Hooray! Me too.
Let’s do it!
Step 1: The Static Site
Let’s work through this process together using a real-world example. We’re going to build a super simple version of the Unmute website. (Unmute is a real thing — a side project I’m working on with a few nerdy friends.)
We’ll have a unique home page along with two similar content pages, mimicking a Terms & Conditions page and a Privacy Policy page.
Let’s say the output of the whatever process you went through to obtain the files for your site left you with this mess:
css/styles.cssto hold all your styling for the site.js/bundle.jswhich handles the carousel at the bottom of the home page.imagesas a house for all visual assets.index.htmlto represent your home page.content-page.htmlto represent all other internal pages.
Gotcha!
Take note that we’re making a big assumption here. We’re assuming that you won’t need to mess with your styles.css or bundle.js file. They were bundled up nicely for you by the freelance dev and you won’t need to make changes.
In the real world, it can be a tricky process to take big, bulky, obfuscated CSS and JS files and create a method for adding to them. And it gets even more complicated if you ever have to go back to the developer for changes after you’ve customized one of these.
As a result, we’re considering that process outside the scope of this guide. However, if this need arises, I’ve written a couple relatively simple guides on how to achieve this for both CSS and JavaScript.
Step 2: Create a New Project
Add the contents of the example static project to some directory on your machine. Here’s a link to download the larger example. After doing that, you can find the appropriate files in the 02-static-site/www directory. Move these files into a new directory on your machine. Your folder’s contents should look like this.
Step 3: Setup Eleventy
We’re going to assume you have a computer that is setup for web development. (If not, here’s a guide I wrote on setting up a new Mac for development.)
Once you’re ready to go, open up your command line or terminal application, change into the project directory and install Eleventy:
# navigate to your new project
cd path/to/my/project

# setup project for Eleventy
npm init -y

# install eleventy
npm install -D @11ty/eleventyNote: If you’re tracking your changes with Git, this is a great spot to initialize the repository (git init) and add node_modules to a .gitignore file. If you’re not working with Git, don’t worry about this right now.
I like to add a few shortcuts after this installation to make working with sites more consistent across my machine. Open your package.json file and add the following to the scripts section:
{
  // ...
  "scripts": {
    "build": "eleventy",
    "clean": "rm -rf _site",
    "dev": "eleventy --serve --port 8000"
  }
}Here’s what that file should look like at this point.
Now we have a way to run an Eleventy development server. Run the following command:
# start eleventy server
npm run devYou should now have a dev server running at localhost:8000. And you’ll notice you now have a new _site directory in your project. Eleventy did this automatically for you.
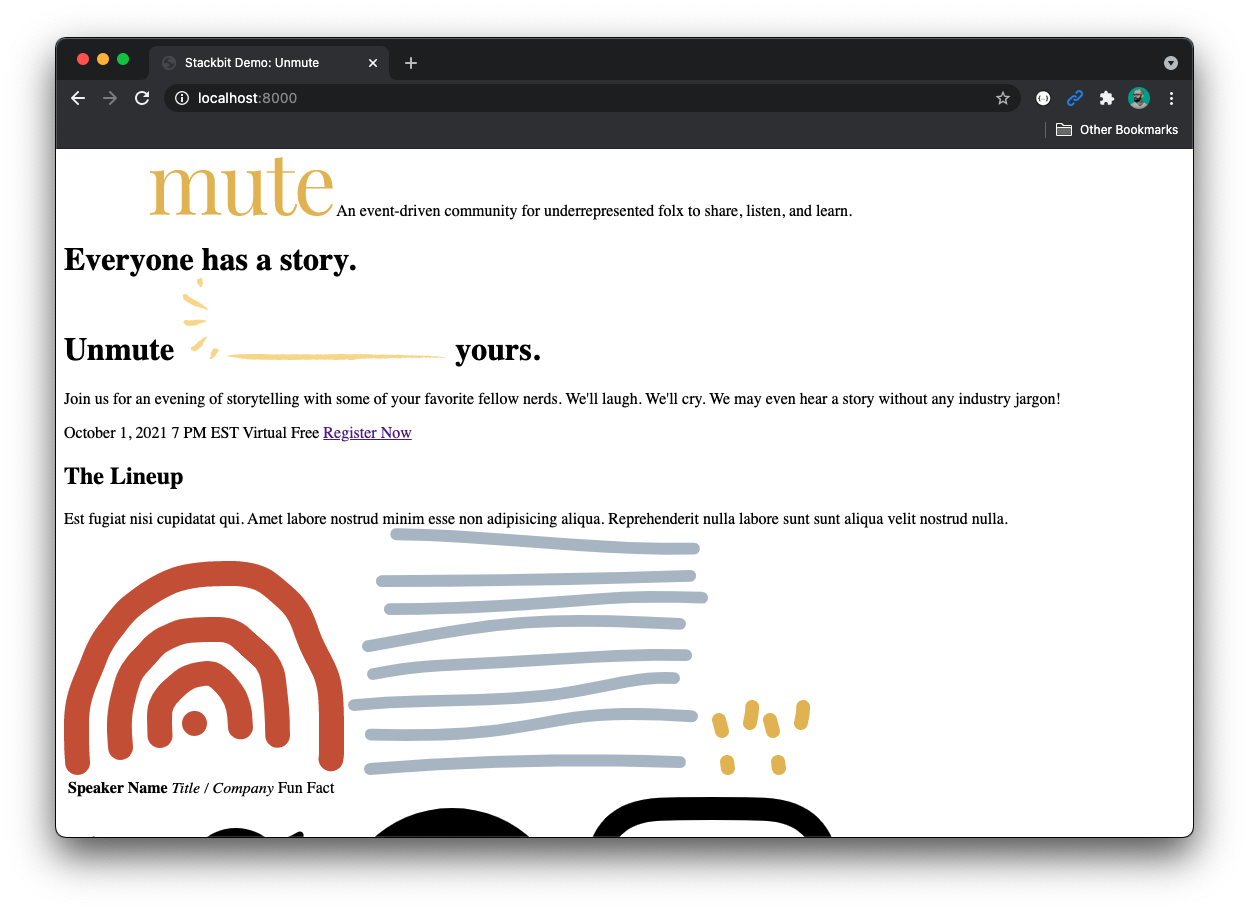
You can open your browser and visit localhost:8000 to see your site, and … something doesn’t look right.
That’s because we didn’t tell Eleventy where our assets are. To do this, we must add an Eleventy config file at .eleventy.js:
module.exports = function (eleventyConfig) {
  // Copy static assets over to _site directory.
  eleventyConfig.addPassthroughCopy('css');
  eleventyConfig.addPassthroughCopy('images');
  eleventyConfig.addPassthroughCopy('js');
  // Return configuration object.
  return {};
};Give the browser a refresh and everything should look good again!

Note: Throughout this guide, when making changes, you may have to clear the cache on your browser. Most browsers have an option to reload while clearing the cache for that site.
Step 4: The Default Layout
In Eleventy (and most static site generators), each page is wrapped in a layout. A layout is just a fancy term for a template. We’re going to begin by creating a default layout. This will be code that every page uses. We do this because, as we’ll soon see, Eleventy supports nesting layouts within one another. So what we’re going to do here is define our base layout.
In looking at index.html and content-page.html, the code that is consistent between the two is mostly contained within the <head> tag, but also includes a few lines at the very bottom of the file. Here’s what it looks like:
<!DOCTYPE html>
<html lang="en">
  <head>
    <meta charset="UTF-8" />
    <meta name="viewport" content="width=device-width, initial-scale=1.0" />
    <link rel="apple-touch-icon" sizes="180x180" href="/images/favicon/apple-touch-icon.png" />
    <link rel="icon" type="image/png" sizes="32x32" href="/images/favicon/favicon-32x32.png" />
    <link rel="icon" type="image/png" sizes="16x16" href="/images/favicon/favicon-16x16.png" />
    <link rel="manifest" href="/images/favicon/site.webmanifest" />
    <link rel="mask-icon" href="/images/favicon/safari-pinned-tab.svg" color="#5bbad5" />
    <meta name="msapplication-TileColor" content="#da532c" />
    <meta name="theme-color" content="#ffffff" />
    <title>Stackbit Demo: Unmute</title>
    <link rel="stylesheet" href="/css/styles.css" />
    <script>
      function onInit(callback) {
        if (typeof App !== 'undefined') return callback();
        setTimeout(onInit, 250, callback);
      }
    </script>
  </head>
  <body class="font-default">
    <!-- This was the unique code -->

    <script src="/js/bundle.js"></script>
  </body>
</html>Put that code in a new file: _includes/default.njk. And in the spot where the unique code existed, add the Nunjucks variable content. (More on this in a moment.) Your resulting file should look like this.
Three items are important to note in this new template:
- We changed the file extension from
.htmlto.njk. This means we’re using Nunjucks as our templating language. Eleventy supports a number of languages. Nunjucks is nice for staying with our theme of using JavaScript. And it’s also fairly minimalistic, which is nice for our example. - We added a single Nunjucks variable,
contentand passed asafefilter to it.contenttells Nunjucks to render the content of the each page in that area. That means all of our page content will fall where you see{{ content | safe }}. - The
_includesdirectory has some special characteristics that make it easy to … well, include files. Read more here.
Nothing has changed if we refresh the browser because we haven’t wired these up yet. When we go to the home page, we’re still just looking at index.html, which isn’t using our new layout yet.
Step 5: Wrap the home page in the new layout
Let’s adjust our home page to use the new layout.
Begin by changing index.html to index.njk. This is going to help us in the future when we want to use Nunjucks variables or tags in the page.
Now, remove all the code you extracted to create the layout and refresh your browser.
What the heck? You’re back to a page without styles. What happened?
What happened is that you removed your references to the CSS and JS files, which were in the <head> and near the bottom of the <body>, but you didn’t tell Eleventy to use a layout. So let’s change that. Add the following at the top of your index.njk file:
---
layout: default
---Now refresh the browser and you should see your styles come back!
This style code — three hyphens, then some code, then three more hyphens — is called frontmatter. It’s like code before the code. It provides us a space to place meta information about that file that won’t ultimately be written to your browser screen.
The last thing to note here is that you will want to either remove or change the comments in your code. Nunjucks comments look a little different than HTML comments (although they will ultimately still be treated as comments, so you can ignore this if you’d like).
Any code between <!-- and --> is an HTML comment. Either remove these or change them to {# and #}.
In the end, this is what your new index.njk file should look like.
Step 6: Content Pages
Now let’s add a couple plain content pages. Our developer delivered a generic content page to us called content-page.html. We want to use that to create multiple pages. In this case, maybe those are Terms & Conditions and Privacy Policy pages.
To do this we first want to make our generic content page a layout. To do that rename content-page.html to content-page.njk and move it into the _includes directory.
Now, here’s a really weird and super cool thing about Eleventy — we can nest layouts in other layouts. What that means is that because the content page has code that we’ve already used in _includes/default.njk, we can reuse that with the content page layout.
To do this, remove the shared code from _includes/content-page.njk and specify the layout in the frontmatter at the top of the file.
Now you can create two new files, terms.njk (or terms.html — we aren’t doing anything special at this point) and privacy.njk. Add some content (I used a generator for the content and you can use what I have) and tell Eleventy to use the “content-page” layout:
---
layout: 'content-page'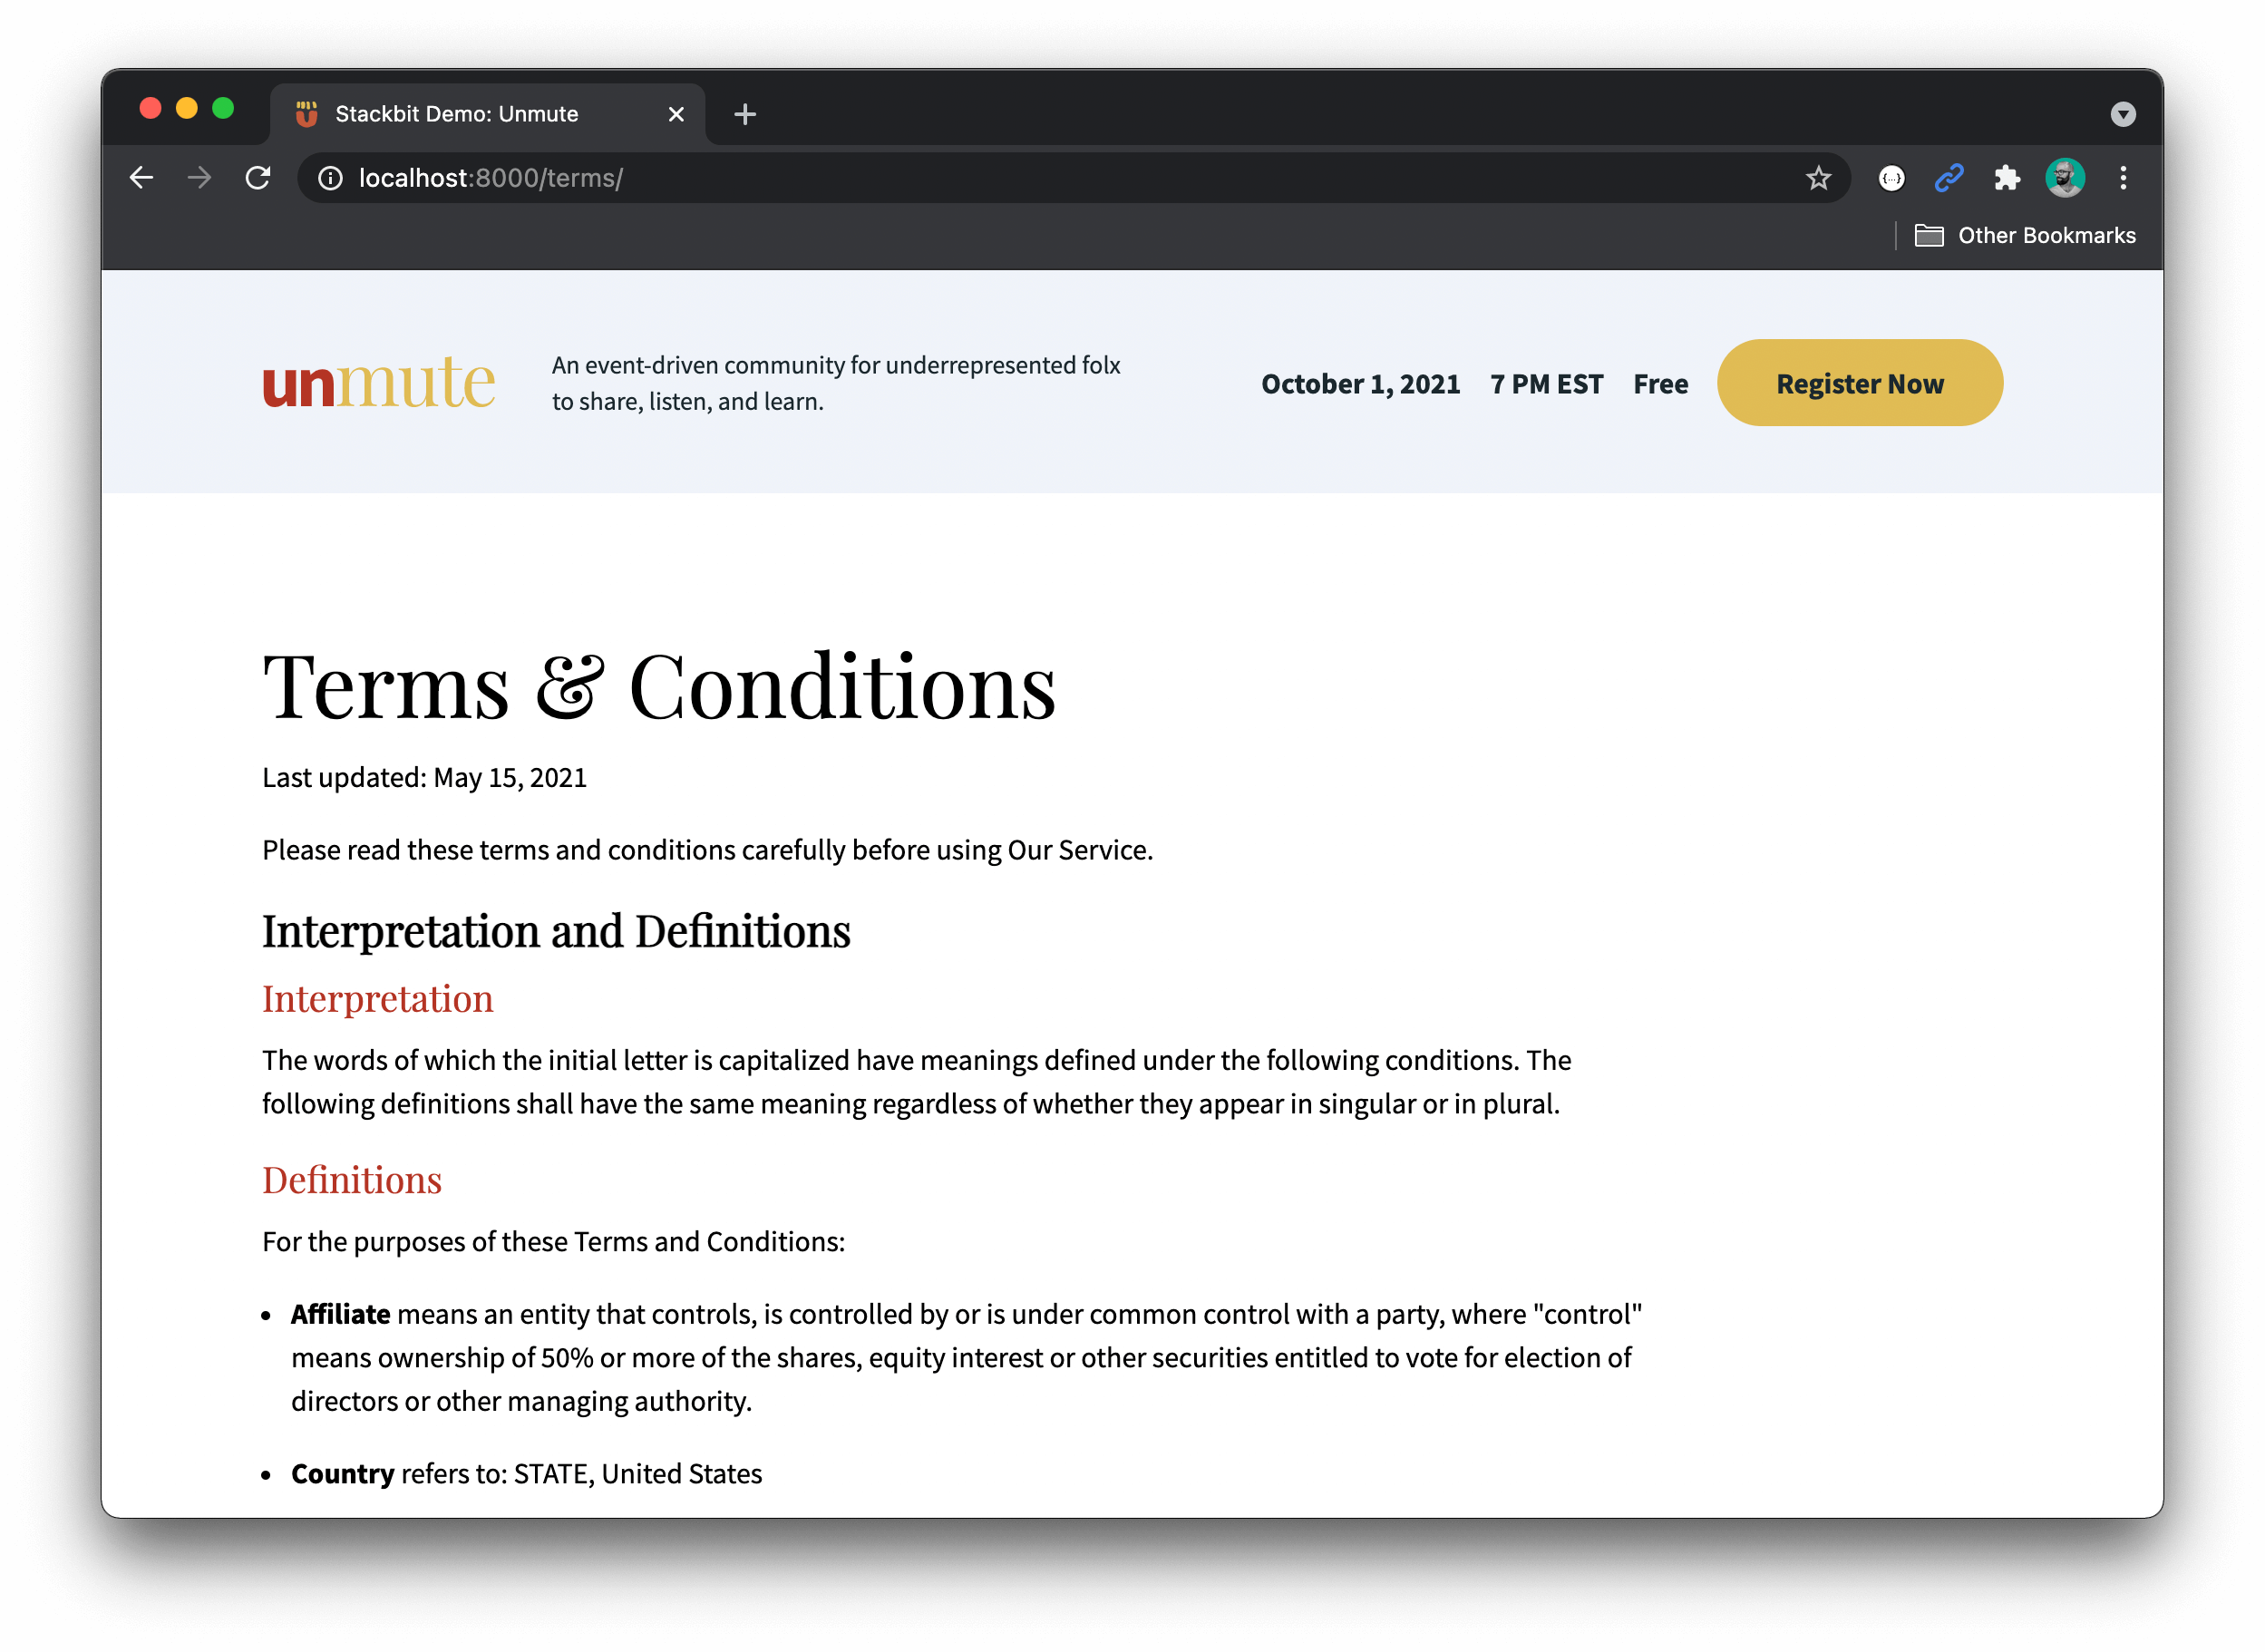
---Now you can go to localhost:8000/terms and localhost:8000/privacy and you should see your nicely-formatted content.
Here are the links to these files at this stage:
Step 7: Extracting Shared Code
Now you’re in good shape and have a pattern to create new pages with a nice layout. Any new file you create with the “content-page” layout will now have a header and footer wrapping your content.
But, we still have an opportunity for some improvement. While we are using a layout to create multiple pages, which means we’re sharing code, we do still have some duplicated code. Now the home page (index.njk) and the content page layout (_includes/content-page.njk) have separate footers. Even though they look the same, you’d have to edit the content in both if you wanted to make a global change.
Let’s make that easier. Pull the footer content into its own file in the _includes directory, _includes/footer.njk (see here). Then remove that shared code from the home page and content page layout and replace it with the include Nunjucks tag:
{% include "footer.njk" %}(See the new index.njk and _includes/content-page.njk files.)
Now you can make the change once and see it work everywhere. For example, you could add links to the terms and privacy pages.
Note: You could have chosen to include the footer directly in the default layout, or even reference in in the default layout. This is entirely up to you and your project. In this case, I’m accounting for some future template that won’t want the footer. But if we’re sure every page wants the footer, maybe it makes sense to put it in the default layout.
Other Opportunities
As your site grows, you’ll find other opportunities for improvement and abstraction (abstraction being the process of cleaning up code to be shared).
Shared Images
For example, many of the shapes you see on the pages are SVG elements. They are images, but represented with HTML code. And many of them are used more than once.
You could remove the <svg> elements and turn them into their own file in the _includes directory. (You could even put them in their own subdirectory so they are grouped together.) Then you can reference them with a Nunjucks tag.
Unique Titles
You may also run into the opposite issue at some point, where you’ll have code or content in a shared space, but you want it to be unique to some particular template. For example, you’ll want the title of the page (contained in the <title> attribute) to be unique to each page. But that code is nestled up in the default layout.
This is where Nunjucks variables and page frontmatter comes into play. Take the terms page, for example. You could add a title attribute in its frontmatter:
---
layout: 'content-page'
title: 'Terms & Conditions'
---Then, in the _includes/default.njk layout, you can use the title variable.
<title>{{ title }}</title>You could make the same change to the _includes/content-page.njk body so that you don’t have to write the <h1> on every page. Something like this:
<h1>{{ title }}</h1>The world is your oyster when it comes to finding these efficiencies. It’s all about how you want to work and how you want the framework (Eleventy) to work for you.
I bucketed a handful of these changes together and did them all at once. Here are the changes I made and the files in the project at this point.
Wrapping Up
Phew! Take a break, give yourself a pat on the back. This process can be a harrowing one, especially the first time around. If you’ve made it through, you deserve a break and some ice cream.
To quickly recap. What we started with was a jumbled mess of HTML files, handed to you by some developer. We took those files and turned them into layouts (or templates) that we could use to quickly create new pages with the same design.
Where do we go from here?
I’m glad you let me ask that question on your behalf, because we have a great next step! Instead of using .html or .njk files for our content, you can double-down on frontmatter and markdown to create a truly powerful editing experience that gets all the code out of your way and keeps you focused on only the content.
And, lucky for you, we have a guide to keep this thing going and to walk you through that process.
But first, go get that ice cream. One of the first stops on the Jamstack is to move from static HTML files to a static site generator. Here's an in-depth guide that follows the process with Eleventy.
