


There are a lot of options for developers building Jamstack sites when they need to handle forms. For example, this excellent reference post from Bejamas on form handling lists and compares 24 different options! 😮
In this post, I want to focus on one of those options: Netlify Forms. If you are deploying to Netlify, they are extremely easy to set up and use. Even better, if your site is built using Stackbit, all the forms within the generated site code come prewired for Netlify Forms. By understanding how they work, it'll make it easier for you to update existing forms or create new forms on your site.
Netlify Forms Pricing
Before we dig into code, it's probably worth getting the pricing discussion out of the way. Netlify Forms are free to start, but include 100 submissions per site per month as part of the free plan. This should be sufficient for many sites, but, if you need more, you can purchase 1,000 submissions for $19 and $9 for every 500 additional submissions after that. Full details can be found on Netlify's pricing page.
I should also note that, while Stackbit deploys to Netlify and Netlify forms are enabled by default, the forms pricng and billing is part of your Netlify account and not connected to your Stackbit account in any way.
Netlify Forms Basics
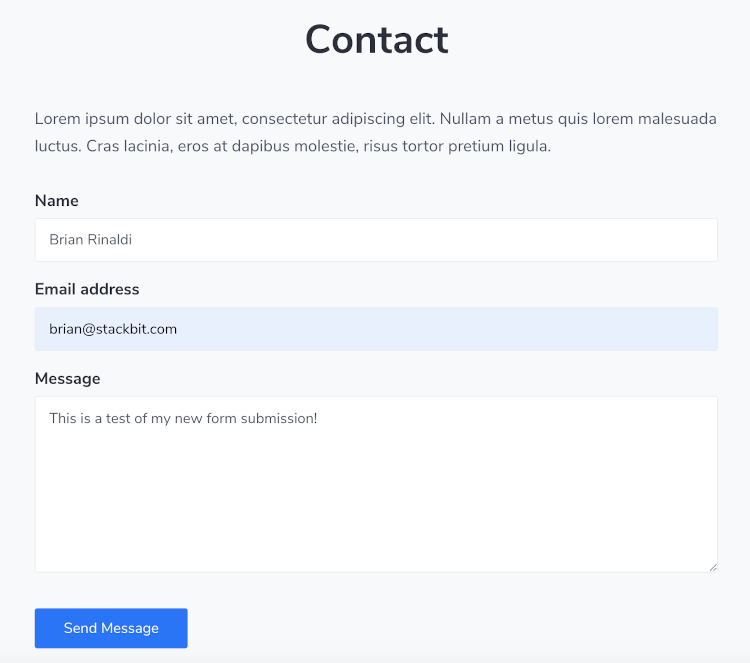
Much of the power of Netlify Forms comes in how simple they are to implement. Let's take a simple contact form you might see on a typical site (the one below is based upon the contact form Stackbit creates when for projects created in the site builder).
<form name="simpleContactForm" method="POST" id="simple-contact-form" class="contact-form">
  <p class="form-row">
    <label id="contact-form-name-label" for="contact-form-name" class="form-label">Name</label>
    <input type="text" name="name" id="contact-form-name" aria-labelledby="contact-form-name-label" class="form-input" />
  </p>
  <p class="form-row">
    <label id="contact-form-email-label" for="contact-form-email" class="form-label">Email address</label>
    <input type="email" name="email" id="contact-form-email" aria-labelledby="contact-form-email-label" class="form-input" />
  </p>
  <p class="form-row">
    <label id="contact-form-message-label" for="contact-form-message" class="form-label">Message</label>
    <textarea name="message" id="contact-form-message" aria-labelledby="contact-form-message-label" class="form-textarea" rows="7"></textarea>
  </p>
  <p class="form-row form-submit">
    <button type="submit" class="button">Send Message</button>
  </p>
</form>To enable this form to work with Netlify Forms, all we need to do is add a data-netlify="true" attribute to the form element like the following:
<form name="simpleContactForm" method="POST" data-netlify="true" id="simple-contact-form" class="contact-form">...</form>That's all. Now, if I were to submit the form as shown below...
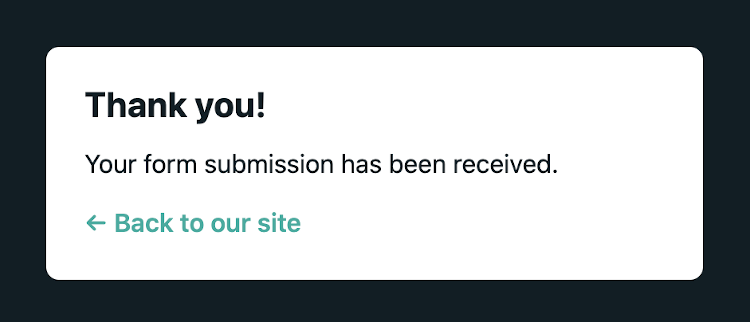
...it would take me to the default thank you page provided by Netlify...
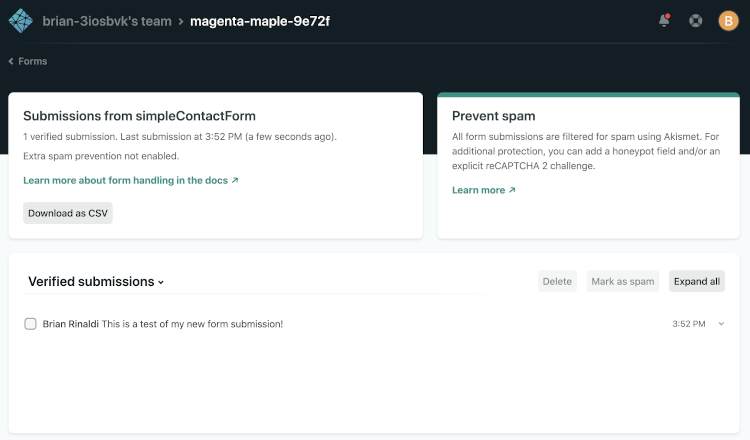
...and I can already access the form submissions in my Netlify dashboard.
Advanced Form Features
So, that was easy, but it may not be exactly what you want. For instance, you may want a custom confirmation page and you may want to ensure that bots can't submit your form. Perhaps you may even want to submit the form via JavaScript rather than a standard HTML form post. All of these things are possible, so let's review some of the more advanced functionality available in Netlify Forms.
Confirmation Page
You'll likely want to use a custom confirmation page rather than the default provided by Netlify. In order to do so, you only need to include an action atttribute on your form. The action should contain the path of the form confirmation page on your site relative to the root of your site. Keep in mind that this is not the file path, but the path to the page when the site is built (for example, the Hugo file path might be /content/thanks.md but the path is just /thanks). Here's the form tag above updated with an action:
<form name="simpleContactForm" method="POST" action="/thanks" data-netlify="true" id="simple-contact-form" class="contact-form"></form>Spam Protection
Netlify Forms already run through a spam filter using Askimet but you can configure them for additional spam protection. There is support for a honeypot field designed to detect bot submissions of a form. This only requires that you include a field in your form that is not visible to the user and then identify the name of the field in a data-netlify-honeypot="true" attribute to the form tag. For example, here is the same form as above, but with the honeypot protection added.
<form
  name="simpleContactForm"
  method="POST"
  action="/thanks"
  data-netlify="true"
  data-netlify-honeypot="bot-field"
  id="simple-contact-form"
  class="contact-form"
>
  <p class="hidden">
    <label id="contact-form-bot-label">Don't fill this out if you're human: <input name="bot-field" aria-labelledby="contact-form-bot-label" /></label>
  </p>
  <p class="form-row">
    <label id="contact-form-name-label" for="contact-form-name" class="form-label">Name</label>
    <input type="text" name="name" id="contact-form-name" aria-labelledby="contact-form-name-label" class="form-input" />
  </p>
  <p class="form-row">
    <label id="contact-form-email-label" for="contact-form-email" class="form-label">Email address</label>
    <input type="email" name="email" id="contact-form-email" aria-labelledby="contact-form-email-label" class="form-input" />
  </p>
  <p class="form-row">
    <label id="contact-form-message-label" for="contact-form-message" class="form-label">Message</label>
    <textarea name="message" id="contact-form-message" aria-labelledby="contact-form-message-label" class="form-textarea" rows="7"></textarea>
  </p>
  <p class="form-row form-submit">
    <button type="submit" class="button">Send Message</button>
  </p>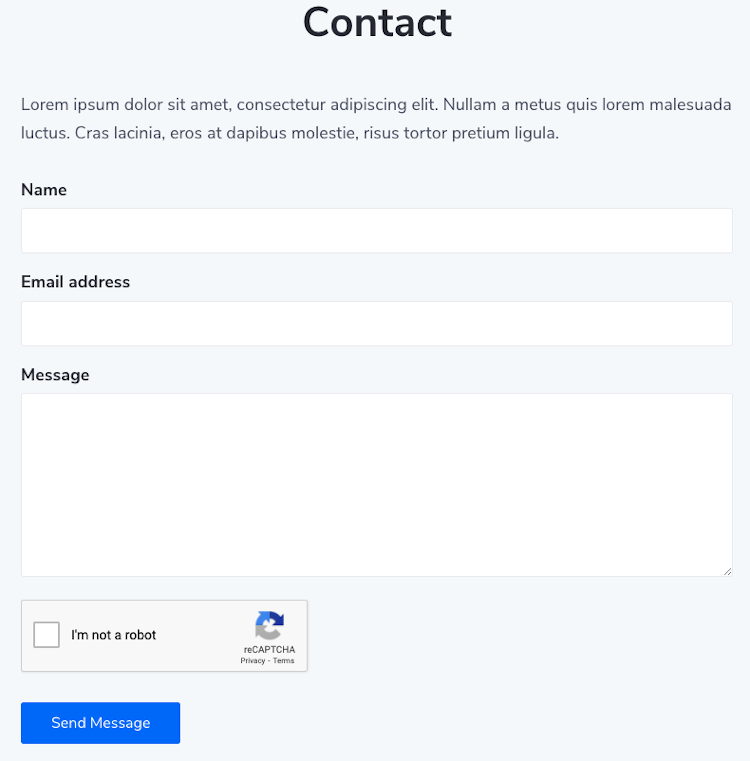
</form>Adding reCAPTCHA challenge protection to your form works similarly. First add a data-netlify-recaptcha="true" attribute to your form element and add a div within the form that also has data-netlify-recaptcha="true". For example, here's the same form with a reCAPTCHA challenge.
<form name="simpleContactForm" method="POST" data-netlify="true" data-netlify-recaptcha="true" id="simple-contact-form" class="contact-form">
  <p class="form-row">
    <label id="contact-form-name-label" for="contact-form-name" class="form-label">Name</label>
    <input type="text" name="name" id="contact-form-name" aria-labelledby="contact-form-name-label" class="form-input" />
  </p>
  <p class="form-row">
    <label id="contact-form-email-label" for="contact-form-email" class="form-label">Email address</label>
    <input type="email" name="email" id="contact-form-email" aria-labelledby="contact-form-email-label" class="form-input" />
  </p>
  <p class="form-row">
    <label id="contact-form-message-label" for="contact-form-message" class="form-label">Message</label>
    <textarea name="message" id="contact-form-message" aria-labelledby="contact-form-message-label" class="form-textarea" rows="7"></textarea>
  </p>
  <div data-netlify-recaptcha="true" class="form-row"></div>
  <p class="form-row form-submit">
    <button type="submit" class="button">Send Message</button>
  </p>
</form>Below you can see the same contact form but now containing the reCAPTCHA challenge.
You can learn more about spam protection on Netlify Forms in the documentation.
Submitting a Form with JavaScript
There are times when you might want to submit the form via JavaScript rather than as a standard form post. For example, if you have a modal form, you might want to submit it via JavaScript and close the modal rather than redirect the user via a post submission. Let's see how to do that.
The documentation provides a simple script to do this, however it depends on jQuery. This is fine if you already include jQuery, but, in many cases, you may not. The following example has no dependencies, but I've replaced jQuery's serialize() function with code taken from this CodePen.
Our form element should still be enabled for Netlify Forms as in the previous examples.
<form name="jsContactForm" method="POST" action="/thanks" data-netlify="true" id="js-contact-form" class="contact-form"></form>In our JavaScript file, we'll add the serialize() function described above as well as attach an event listener to the form's submit event, if the form exists on the page as below.
const contactForm = document.getElementById('js-contact-form');
if (contactForm) {
  const serialize = function (form) {
    var field,
      l,
      s = [];

    if (typeof form == 'object' && form.nodeName == 'FORM') {
      var len = form.elements.length;

      for (var i = 0; i < len; i++) {
        field = form.elements[i];
        if (
          field.name &&
          !field.disabled &&
          field.type != 'button' &&
          field.type != 'file' &&
          field.type != 'hidden' &&
          field.type != 'reset' &&
          field.type != 'submit'
        ) {
          if (field.type == 'select-multiple') {
            l = form.elements[i].options.length;

            for (var j = 0; j < l; j++) {
              if (field.options[j].selected) {
                s[s.length] = encodeURIComponent(field.name) + '=' + encodeURIComponent(field.options[j].value);
              }
            }
          } else if ((field.type != 'checkbox' && field.type != 'radio') || field.checked) {
            s[s.length] = encodeURIComponent(field.name) + '=' + encodeURIComponent(field.value);
          }
        }
      }
    }
    return s.join('&').replace(/%20/g, '+');
  };
  contactForm.addEventListener('submit', (e) => {
    e.preventDefault();

    const theForm = e.currentTarget;
    const formData = 'form-name=' + theForm.name + '&' + serialize(theForm);
    const options = {
      method: 'POST',
      headers: { 'Content-Type': 'application/x-www-form-urlencoded' },
      body: formData
    };

    fetch('/', options)
      .then(function (response) {
        window.location.assign(theForm.action);
      })
      .catch(function (error) {
        console.log(error);
      });
  });
}Our event listener uses the fetch() API to make the asynchronous call. Notice that it doesn't really matter where we post the form to, Netlify Forms is smart enough to pick up the request and handle it. In this case, our fetch() request posts to / (i.e. the root of the site).
It is worth noting that the content type is set to application/x-www-form-urlencoded. This works because we are sending simple form elements that can be passed as string data. If our form had included a file upload, which Netlify Forms supports, we'd need to use multipart/form-data.
The fetch API returns a JavaScript promise. Assuming the request succeeds, in this case we are just redirecting the user to the value of the form's action attribute. In most case, you'll probably want to perform some other kind of response. In addition, our error handler only dumps the error to the console at the moment. You'll want to display some sort of notification to the user that the form submission failed instead, depending on how your form is displayed.
Netlify Forms in React-based Static Site Generators
Netlify has a post dedicated to this topic. Even though it is a few years old, it is still accurate. However, let's look at this topic as it relates to the two most popular React-based SSGs: Gatsby and Next.js.
The only required change to a Gatsby or Next.js form to enable it to be captured by Netlify Forms is to add a hidden field with the name form-name that contains the name of the form just as our previous examples did within the form tag itself. For example, here's a contact form with a custom confirmation page and the honeypot spam protection enabled that will work in either a Gatsby or Next.js component:
<form
  name="contactForm"
  method="POST"
  action="/contact-thanks"
  data-netlify-honeypot="bot-field"
  data-netlify="true"
  id="contact-form"
  className="contact-form"
>
  <p className="screen-reader-text">
    <label>Don't fill this out if you're human: <input name="bot-field" /></label>
  </p>
  <p className="form-row">
    <label htmlFor="contact-form-name" className="form-label">Name</label>
    <input type="text" name="name" id="contact-form-name" className="form-input" />
  </p>
  <p className="form-row">
    <label htmlFor="contant-form-email" className="form-label">Email address</label>
    <input type="email" name="email" id="contant-form-email" className="form-input" />
  </p>
  <p className="form-row">
    <label htmlFor="contant-form-message" className="form-label">Message</label>
    <textarea name="message" id="contant-form-message" className="form-textarea" rows="7" />
  </p>
  <input type="hidden" name="form-name" value="contactForm" />
  <p className="form-row form-submit">
    <button type="submit" className="button">Send Message</button>
  </p>
</form>Handling Form Submissions via JavaScript in Gatsby and Next.js
To handle your form submission via JavaScript rather than a standard form post, we'll use code similar to the plain old JavaScript form handling shown previously. Here's what we'll need to handle in order to achieve this:
- Our form will need to have state, which will hold the form inputs from the user.
- We'll need a method to handle updating the state as the user enters data into the form fields.
- We'll need an
encodemethod to URL encode the form parameters (ours will be taken from the previously referenced tutorial). - We'll need a method to handle the form submission when the user clicks submit.
- Finally, we'll need to wire all of the above up to the existing form.
The identical code will work for both Next.js and Gatsby sites. Here's the finished code based upon the same contact form we've worked with in the prior examples. Note, however, that we do not need a method and action on the form tag, nor do we need the form-name element as this is wired into the submission script.
import React from 'react';

export default class SectionContact extends React.Component {
    state = {
      name: '',
      email: '',
      message: ''
    };
    handleInputChange = (event) => {
      const target = event.target;
      const value = target.value;
      const name = target.name;
      this.setState({
          [name]: value
      });
    };
    encode = (data) => {
      return Object.keys(data)
          .map(key => encodeURIComponent(key) + "=" + encodeURIComponent(data[key]))
          .join("&");
    }
    handleSubmit = async (e) => {
      e.preventDefault();
      const options = {
        method: 'POST',
        headers: { 'Content-Type': 'application/x-www-form-urlencoded' },
        body: this.encode({ 'form-name': 'contactForm', ...this.state })
      }

      fetch(
        "/",
        options
      )
      .then(function (response) {
        window.location.assign('/contact-thanks/');
      })
      .catch(function (error) {
        console.log(error);
      });
    };
    render() {
        <form name="contactForm" data-netlify="true" id="contact-form" className="contact-form" onSubmit={this.handleSubmit}>
        <p className="form-row">
            <label htmlFor="contact-form-name" className="form-label">Name</label>
            <input type="text" name="name" id="contact-form-name" className="form-input" value={this.state.name} onChange={this.handleInputChange}/>
        </p>
        <p className="form-row">
            <label htmlFor="contant-form-email" className="form-label">Email address</label>
            <input type="email" name="email" id="contant-form-email" className="form-input" value={this.state.email} onChange={this.handleInputChange}/>
        </p>
        <p className="form-row">
            <label htmlFor="contant-form-message" className="form-label">Message</label>
            <textarea name="message" id="contant-form-message" className="form-textarea" rows="7" value={this.state.message} onChange={this.handleInputChange} />
        </p>
        <p className="form-row form-submit">
            <button type="submit" className="button">Send Message</button>
        </p>
    </form>
        );
    }
}Managing Submissions
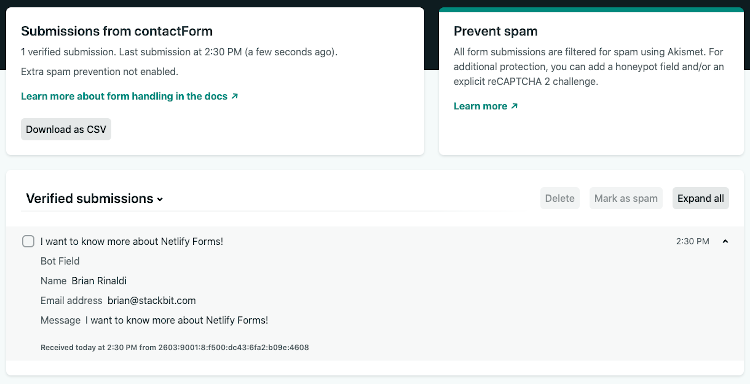
All form submissions handled via Netlify Forms will be stored and accessible via the Forms tab in your project's Netlify dashboard. From here, you can expand them to view the submission details, delete them or mark them as spam. You can also download all the submissions as a CSV file.
Notifications
More than likely you'll want to receive some form of notification when a form is submitted or to put the information into some sort of workflow to process. To manage this, go to Settings > Forms > Form notifications in your project's Netlify dashboard. From there you can configure an email notification, a notification to an existing Slack channel or post form details to a webhook.
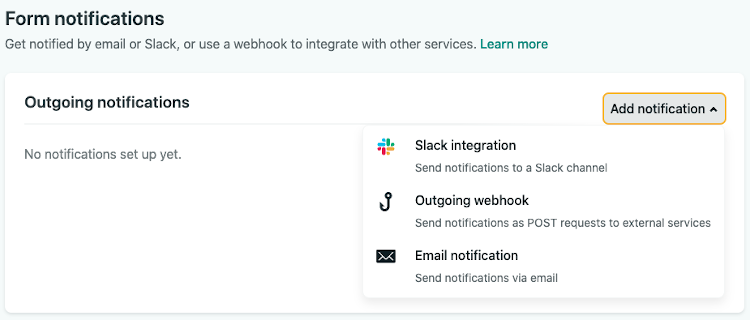
The outgoing webhook offers an opportunity to connect form submissions with any number of tools. For example, you could use a tool like IFTTT or Zapier, both of which offer webhooks, to integrate with the thousands of tools that they have prebuilt integrations for.
Forms Handling in Netlify Functions
Netlify Functions are serverless functions that can easily be deployed with your Netlify project. They can perform all kinds of server-side business logic. They can also respond to events and triggers, including the submission-created event that occurs when a form is submitted. Let's see how we can take advantage of this by automatically writing our contact form submissions to a Google Sheet.
Configuring Google Sheets
Before I start, though, credit goes to this post by Shawn Wang for the inspiration and code examples and this post by Matthew Ström for additional insight into working with the Netlify Forms trigger.
Firstly, we'll be working with this Google Spreadsheet wrapper for Node, which handles much of the complexity for us. So we'll start by adding this to our project via npm install google-spreadsheet.
There are quite a few requirements for connecting to the Google Sheet that Shawn covers in his post. They are:
- We may need to create a project in Google if you do not have one already. Go to your Google APIs dashboard and click the project drop down in the upper-left-hand side of the page and then click the "New Project" button.
- We'll need to enable the Google Sheets API for our project
- We'll need to create service account credentials from the credentials page in our Google APIs dashboard. Go down to the "Service Accounts" section, click "Manage Service Accounts" and then "Create Service Account". The service account name can be anything you choose. For the role, we can choose Project > Editor. We can just click "Done" when asked to grant user's permission to the service account, leaving this blank.
- When the service account is created, select the "Actions" dropdown on the row with our new service account and click "Create Key". Choose JSON and download the key file somewhere safe on your computer.
- Open the file and copy the following items into a
.envfile in your project (be sure that this file is added to your.gitignoreas you do not want to accidentally check in your credentials to a public repository): The value ofclient_emailfrom the JSON file isGOOGLE_SERVICE_ACCOUNT_EMAILin your.envThe value ofprivate_keyin the JSON file isGOOGLE_PRIVATE_KEYin the.env.
Ok. I know that's already a lot of steps, but we're almost done. We just need to create the sheet that we'll connect to:
- Create a spreadsheet in Google Sheets (name it whatever you like, mine is "Contact Form Submissions").
- Add a first row with headers. These need to match the values we'll be sending exactly (even case is important here). For our contact form, these should read "name", "email" and "message". You can freeze the header row if you wish by selecting it in Google Sheets and clicking View > Freeze > 1 Row.
- Copy the ID of the sheet from the URL. For example, my URL is
https://docs.google.com/spreadsheets/d/1sCwnjw0K9a2F9i9oR2MO8tPv_u3X_dIbLa12bnxh2B0/edit#gid=0, so my sheet ID is1sCwnjw0K9a2F9i9oR2MO8tPv_u3X_dIbLa12bnxh2B0. Place this into the.envfile asGOOGLE_SPREADSHEET_ID_FROM_URL.
Writing the Function
Whew! We're finally ready to code our Netlify Function. Let's start by creating a folder named lambda that will hold our functions (this name isn't required, it's just what I chose). Then open the netlify.toml file and add this as our functions folder. For example, here's the contents of my project's netlify.toml.
[build]
publish = "out"
command = "./stackbit-build.sh"
functions = "./lambda"Within the lambda folder, create a file named submission-created.js. The name is critical here as it tells Netlify to call this whenever the submission-created event is triggered. The function itself will look like this (I'll explain it in a moment):
if (!process.env.NETLIFY) {
  // get local env vars if not in CI
  // if in CI i expect its already set via the Netlify UI
  require('dotenv').config();
}

if (!process.env.GOOGLE_SERVICE_ACCOUNT_EMAIL) throw new Error('no GOOGLE_SERVICE_ACCOUNT_EMAIL env var set');
if (!process.env.GOOGLE_PRIVATE_KEY) throw new Error('no GOOGLE_PRIVATE_KEY env var set');
if (!process.env.GOOGLE_SPREADSHEET_ID_FROM_URL) throw new Error('no GOOGLE_SPREADSHEET_ID_FROM_URL env var set');

const { GoogleSpreadsheet } = require('google-spreadsheet');

exports.handler = async (event, context) => {
  const doc = new GoogleSpreadsheet(process.env.GOOGLE_SPREADSHEET_ID_FROM_URL);

  await doc.useServiceAccountAuth({
    client_email: process.env.GOOGLE_SERVICE_ACCOUNT_EMAIL,
    private_key: process.env.GOOGLE_PRIVATE_KEY.replace(/\\n/g, '\n')
  });
  await doc.loadInfo();
  const sheet = doc.sheetsByIndex[0];

  try {
    const data = JSON.parse(event.body).payload.data;
    const addedRow = await sheet.addRow(data);
    return {
      statusCode: 200,
      body: JSON.stringify({
        message: `POST Success - added row ${addedRow._rowNumber - 1}`
      })
    };
  } catch (err) {
    console.error('error ocurred in processing ', event);
    console.error(err);
    return {
      statusCode: 500,
      body: err.toString()
    };
  }
};The first part just looks for the required environment variables. Right now these are in our .env file but we'll need to also add these via our Netlify Dashboard before the function will work when deployed. To do this, go to your Settings > Build & Deploy > Environment and set the same variable names and values as from the .env.
The core of the function first connects to the Google Sheet. Once this connection succeeds, it parses the JSON payload automatically passed in by Netlify with the submission-created event trigger and adds a row to the sheet. Yes, you are justified in thinking that the code is way simpler than the setup it required.
Here you can see the code in action as I submit the form and it "magically" appears in my spreadsheet.
Obviously, you are not limited to this functionality. This is just one example and you can do any number of amazing things with your form submission data in your Netlify Function. For a very good reference on the data that Netlify makes available in Netlify Forms-related functions, check this post by Raymond Camden.
Where to Go From Here
My goal here was to give you the most comprehensive guide I could to Netlify Forms. The documentation is still an important resource. You can also get support for your Netlify Forms questions via Netlify's community forums, but hopefully I have given you everything you need. So, first remember that no one loves filling out forms, and try not to go overboard. Otherwise, just go build some forms! Forms are a standard requirement for any site. Netlify's Forms feature makes forms in Jamstack sites easy - and it's built into Stackbit sites. This guide shows you everything you need to know about Netlify Forms.